
How to Transfer Embroidery Patterns onto Fabric
Now that you have all the essential materials you need to begin embroidery, let’s get into the first step to actually begin stitching - transferring your design!
There are several methods for transferring embroidery patterns to fabric, and I encourage you to try them all so you can decide which way works best for you. The method you choose may also depend on the project you’re working on, how heavy your fabric is, or the colors you’re working with.
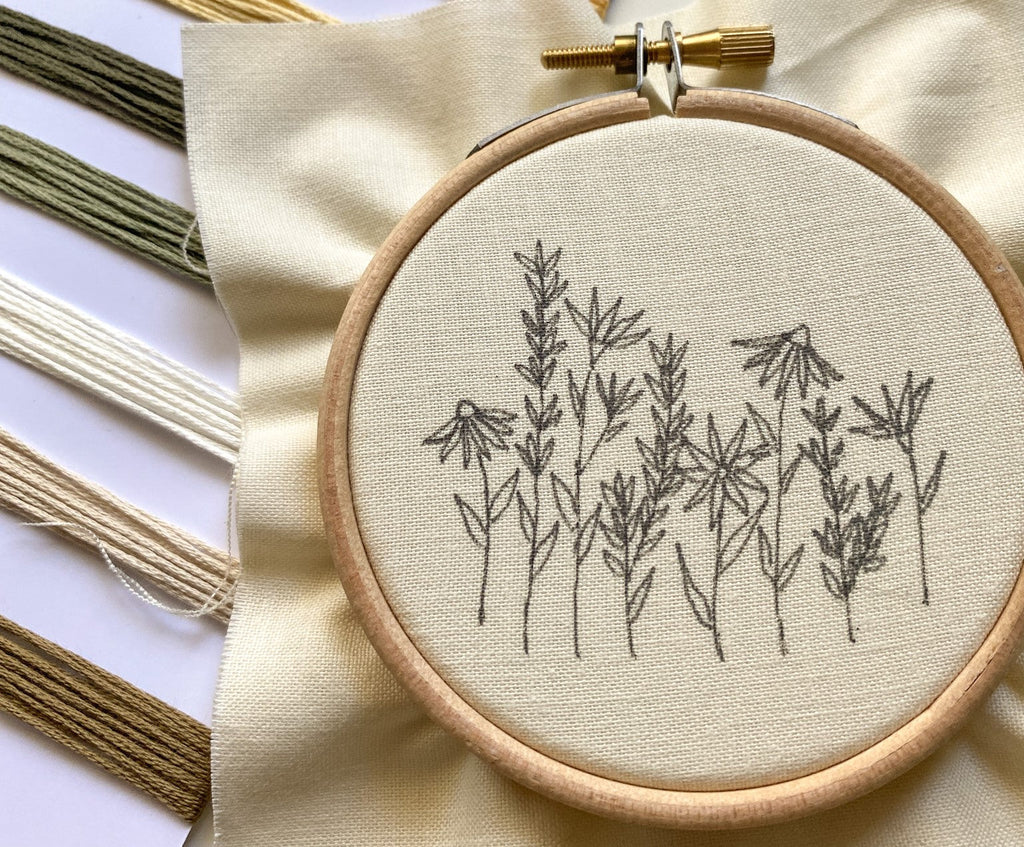
Since I primarily use a lightweight fabric and gravitate towards lighter colors, my go-to technique for transferring patterns is tracing the design using a light source. Keep reading to learn how I do this!
You’ll need the following supplies:

Step 1: Load one piece of fabric into your embroidery hoop.

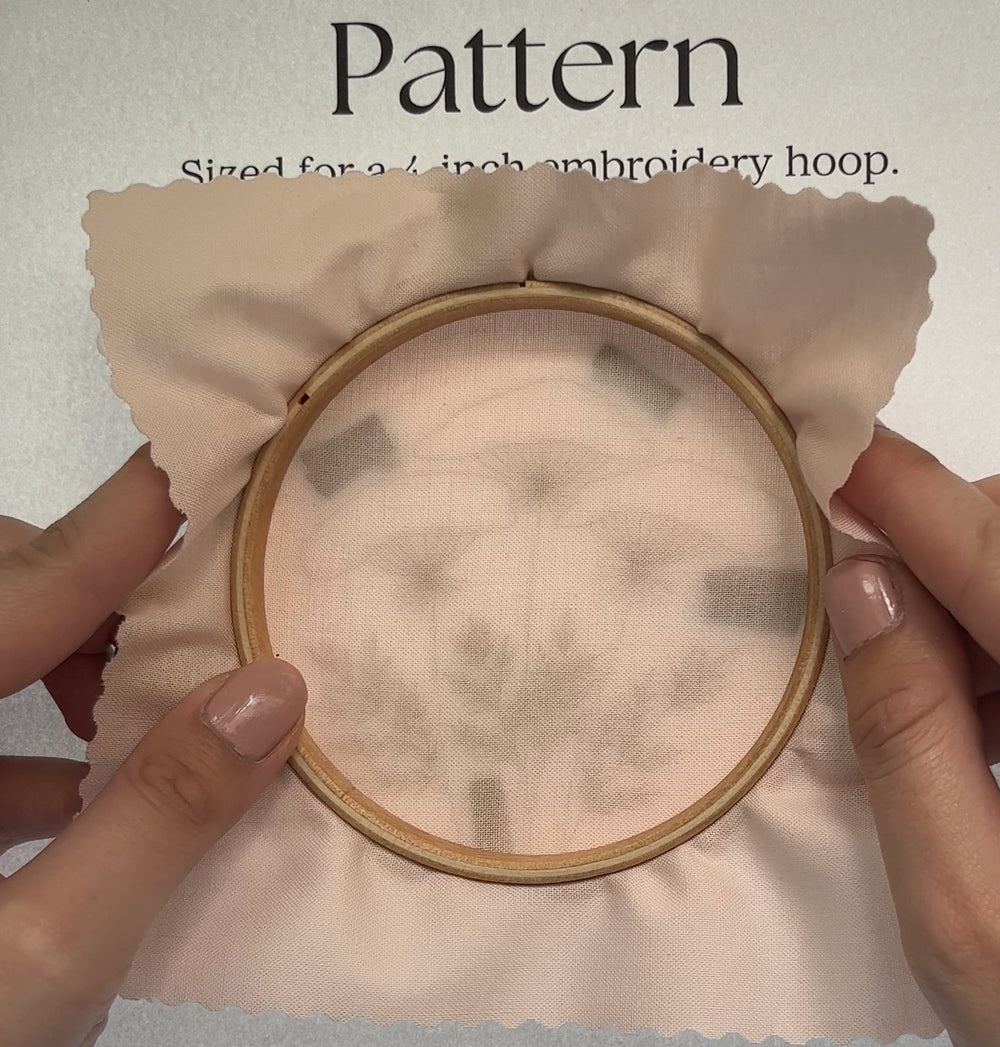
Step 2: Roll up a few pieces of tape and place them along the pattern. Then place your hoop front side down onto the pattern, making sure the design is centered. Using the tape is optional, but I think it's so helpful. It makes sure that if your hoop slips at all while tracing, you won't have to realign your fabric with the pattern!
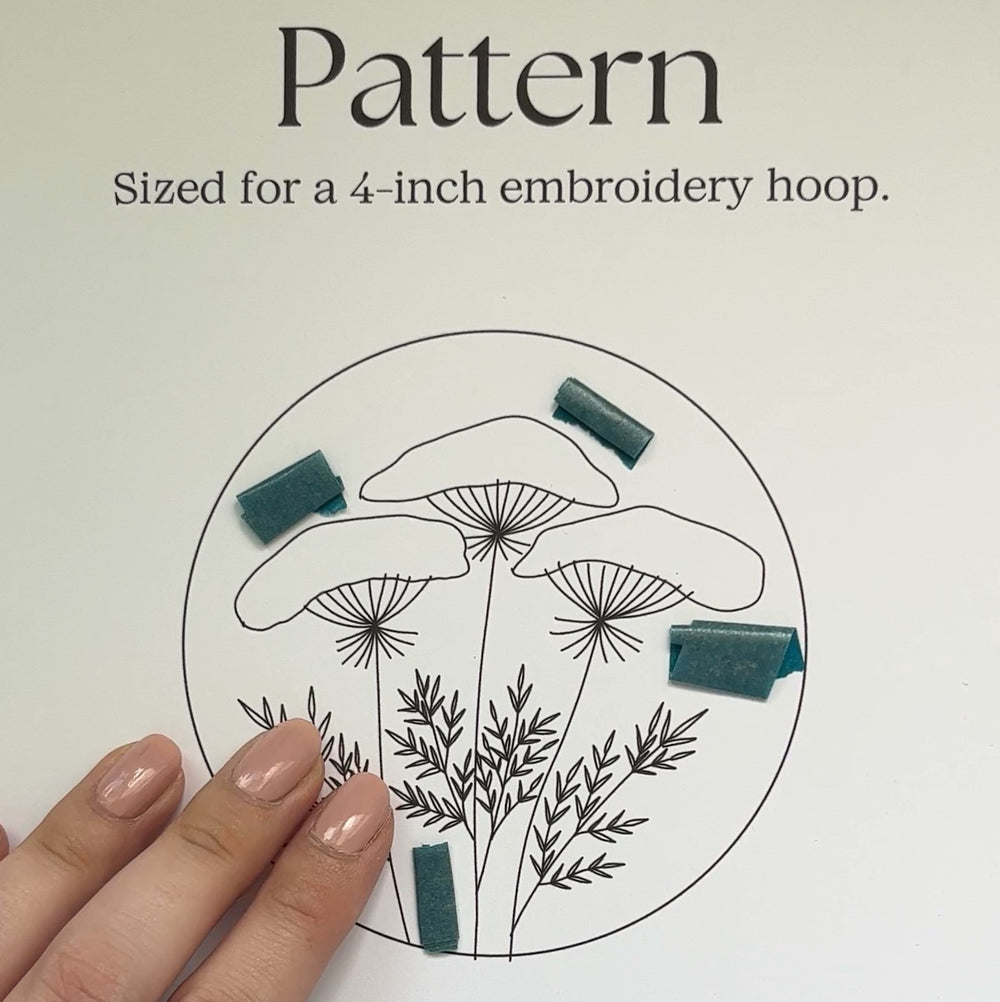
Step 3: Place the hoop on your light source to illuminate the pattern through the fabric. I’m using my favorite light box* - you can find a link to purchase it here if you’d like to try it out!
*Note: A light box isn’t necessary - use what you have readily available! You can also hold your hoop and pattern up to a window, computer screen, or even an upside down clear bin with a flashlight underneath. There are many ways to utilize the light sources in your home, and I encourage you to get creative!
Step 4: Trace the design with a heat erasable pen. Be sure to take your time while tracing, especially if it's a detailed pattern! I find it helpful to make small strokes with my pen instead of trying to trace the whole shape in one go.

Step 5: Flip the fabric so the design is on the front of the hoop. If stitching through two layers of fabric, load both pieces into the hoop together.

And that's how I like to transfer all my embroidery patterns! Be sure to give it a try along with the other methods for marking patterns on fabric.
Although tracing the pattern with a light source is my favorite method, the disadvantages to using this technique is you might not be able to see enough light through dark or heavier fabrics and it’s difficult to trace patterns with intricate designs.
Luckily, there are multiple methods that work around these issues!

☼ Dark or Heavy Fabrics
For dark or heavy fabrics, you can use white transfer paper or tracing paper to mark the pattern.
- With white transfer paper, you have one side of the paper coated with a white chalky substance that you place facing down on the fabric and as you draw or trace your design on top, a white outline will appear. Upon finishing, the stencil will come out with a good wash.
- But if you prefer not to wash your finished piece, you can use tracing paper instead! With this, you would trace your pattern onto the paper, secure the design onto your fabric with long loose stitches that can be removed later, and stitch through the paper and fabric. Once you’re finished, you’ll be able to tear the tracing paper away!
☼ Permanent Patterns
If you’d like the pattern to permanently remain on the fabric, you could use heat transfer pencils or pens.
To do this, you would draw your design on paper using the heat transfer pen or pencil and press the pattern onto fabric using a hot iron. If you prefer not to draw the pattern beforehand, there’s also hot iron transfers you can purchase that are ready-to-use and will transfer over with a hot iron as well.
☼ Traditional
For a more traditional technique, there’s also pouncing.
This involves pricking holes into a paper with your design, securing it to fabric, and using a small fabric pad to apply powdered pigment to the holes.
☼ Intricate Designs
A fan favorite and probably the easiest method for transferring patterns onto fabric is using sticky water soluble paper.
This technique is super helpful when working with dark fabrics, but also if your pattern has an elaborate design. Just print out your design, stick the paper to your fabric, and get stitching! When you’re done, just soak the design in water for a few minutes and gently rub any remaining paper off.
You can find water soluble paper in most craft and fabric stores to print your own designs; however, if you’re looking for some ready-to-use designs, be sure to check out the Stick & Stitch packs in my shop! Each pack includes 10 pre-cut patterns that you can apply to anything needing a little pizzazz - a favorite sweater, tee, hat, or even a set of cloth napkins!

As you can see, there are numerous ways you can transfer patterns onto fabric depending on your preference, project, and fabric. Make sure to give each one a try and report back on which one you find works best for you!
Keep following along for more helpful embroidery tips and tutorials. I'm so excited for you to learn embroidery with me!
Happy stitching!

Leave a comment